Philips
Genius User Manual
Philips
Genius User Manual
Introduction
·
Getting Started
·
Login
·
Profile
·
Basic Tools
·
Advanced Tools
·
File Manager
·
Share
·
Collaboration
tools
|
Today's
diverse learning space often needs streamlining tools for a better
experience. Bringing you ‘Philips Genius’ – the enhanced
interactive teaching platform! Designed for classrooms, online classes, and
hybrid sessions, this platform allows instructors to manage different formats
easily and simultaneously. Through effortless QR code scanning, you can login easily to
access the platform. Philips Genius’ interface is
so-straightforward that you can start to ‘Draw’
visuals with a pen or highlighter right away. ‘Erase’
lets you remove the visuals entirely, or through point-by-point. Choose different
objects to bring up context-specific menu operations. Type
down the ‘Text’ you need, style it. Moreover, the platform also offers different
utility ‘Tools’ such as calculator,
geometry tools like virtual compass,
protractor or angle to create and measure accurate shapes. From the ‘Shape’
menu, insert from a wide range of different shapes, including the custom
ones. The ‘Image’ section lets you to add
custom images, either from web searches or through own uploads. Add ‘Media’ to the Lesson from your own library
of videos, or from sites such as YouTube. Incorporate any custom ‘Object’ such as 3D visuals. And, resize and align
them as per your content. What goes without the ‘Audio’?
Yes, you can add your custom audio required for the presentation. Also, add
any type of ‘Document’, be it words or
presentations! Add different webpages
for presenting, and navigate between them during different segments of the
Lesson. At any point of given time, easily change the overall Backdrop’s ‘Color’ and ‘Pattern’ depending on the
nature of the content. The ‘File
Manager’ lets you organize all file types added during the presentation,
and it even keeps them segregated under ‘My Library’
and ‘Public Library’ for your convenience. Also, Philips Genius lets you connect with
Google Classroom and Google Drive to enhance your Lesson experience. Finally,
you can even share the saved Lessons using a QR code or email. Philips Genius makes interactive
teaching more accessible and efficient for all educational settings. |
Login
·
Access to Philips
Genius
·
Login through QR Code
·
Login through
email ID
·
Logout
|
Access to
Philips Genius
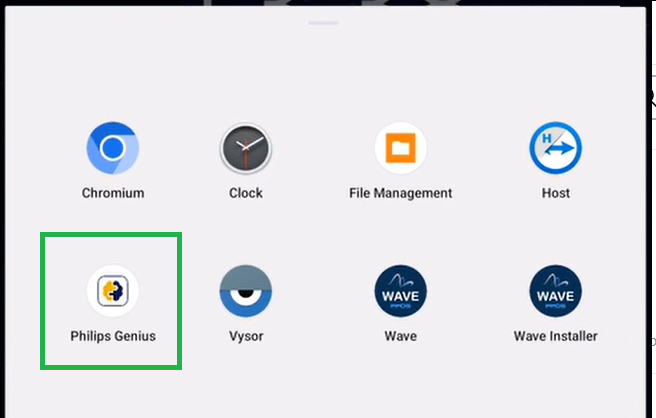
Philips Genius Apk is available as Android app on PPDS device in Dashboard section. Clicking on icon depicted below will launch application that takes user to login screen.
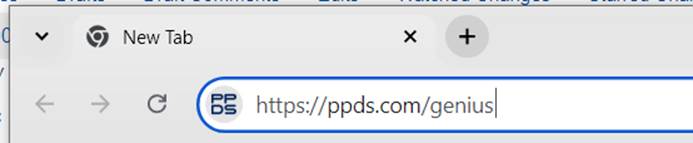
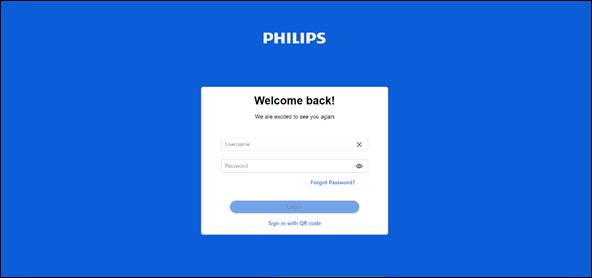
Philips Genius can also be accessed from PC/Laptop browser using link: https://ppds.com/genius that takes user to login screen.
Login through QR Code
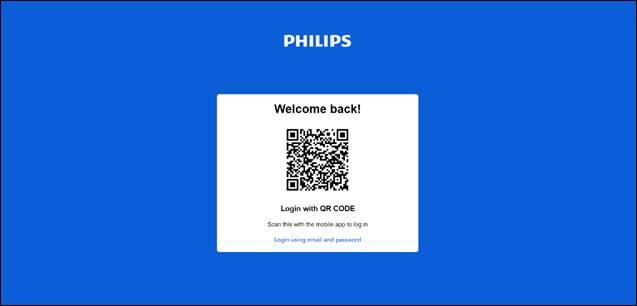
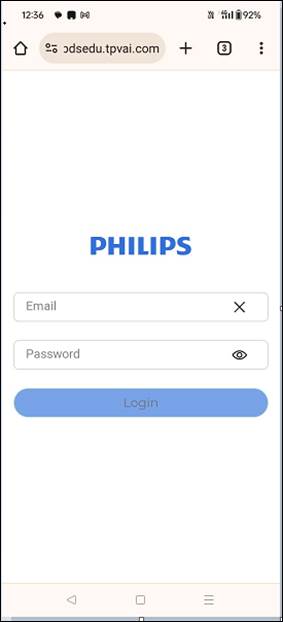
User is taken to login screen where user can perform QR code scanning to access the platform. Step1: QRCode shown on device or in Browser:
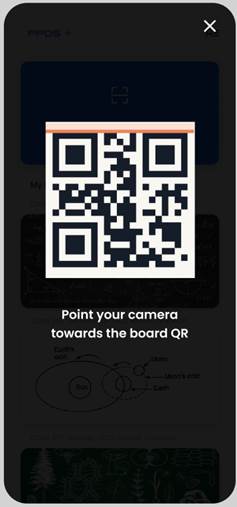
Step2: Open Camera in Mobile phone and scan QRCode. Click on Link displayed on mobile phone to open link in mobile phone browser
Step3: Enter Email ID and password on mobile phone browser webpage. After login is successful then user need to go back to device or PC browser
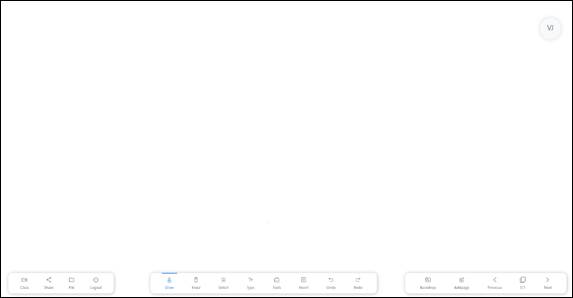
Step4: You will be logged in Device or PC Browser and taken to Whiteboard
Login through Email Address and Password
You can also login through email address and password that is shown on login page at launch of application Step1: Enter Email ID and password and
click login button
Step2: You will be logged in on Device or PC Browser and taken to Whiteboard after showing loader screen
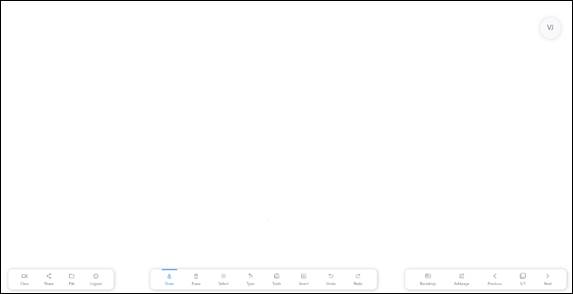
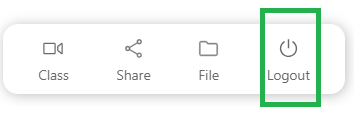
Logout
User can logout of Whiteboard and go back to Login screen by clicking on Logout button on Whiteboard
|

Profile
·
Profile Menu
·
Manage Profile
|
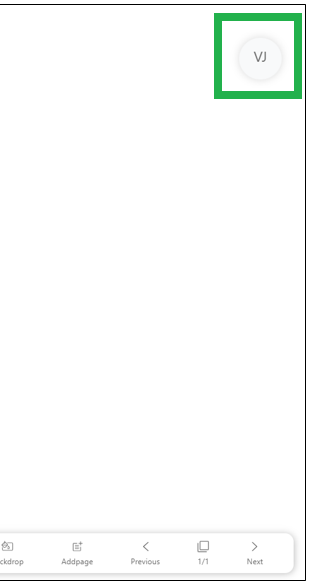
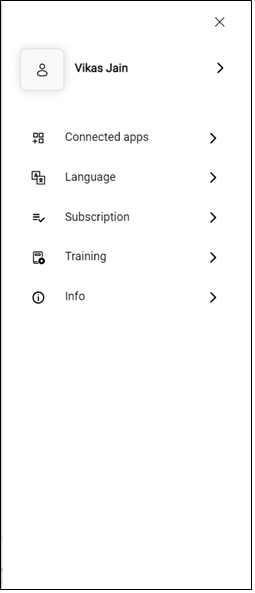
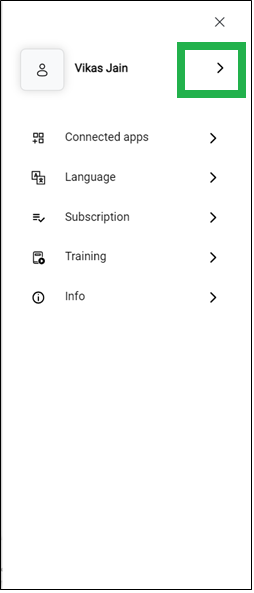
Profile Menu This allows you to view and edit user profile information, view subscription info and current software version. Click on icon showing User Initials to open Profile screen
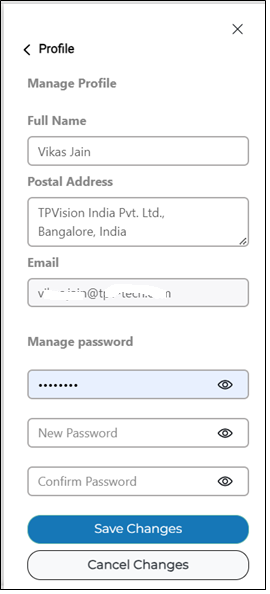
Manage Profile Click on arrow next to user name to view and edit user profile information User can change Name, Postal Address and password using this screen.
|
Basic Tools
·
Draw
·
Erase
·
Select
·
Type text
·
Insert
o Shape
o Image
o Media: Video
& Youtube
o 3D Objects
o Audio
o Documents
o Web Page
·
Undo & Redo
·
Backdrop
·
Page Management
|
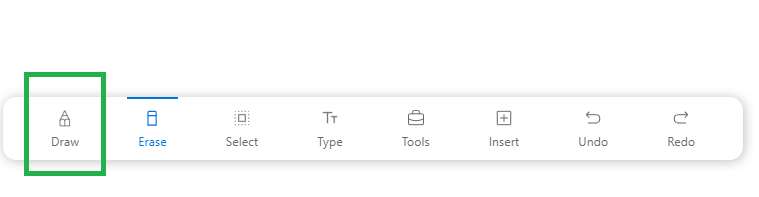
Draw
Philips Genius’ interface is so-straightforward that you can start to ‘Draw’ visuals with a pen or highlighter right away Draw menu can be accessed by clicking on Draw icon in whiteboard
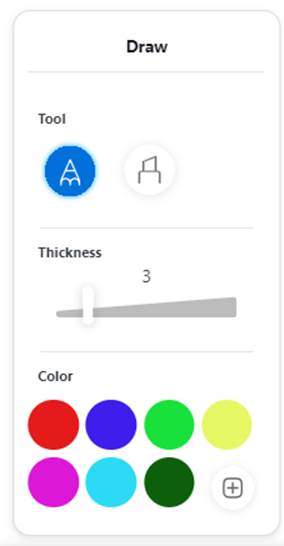
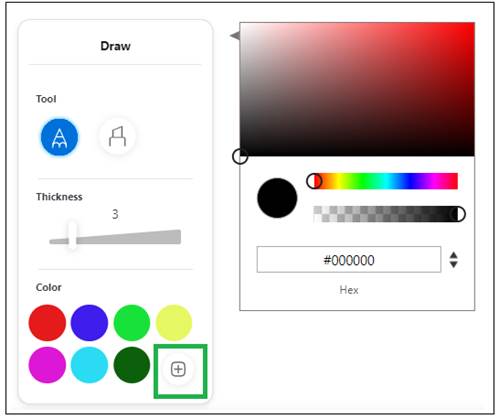
Draw menu has options to select Pen tool or Highlighter tool. Thickness of pen/highlighter can be changed using slider. Color can be selected from palette.
You can add custom color to palette and use custom color for pen/highlighter draw. Custom color creation shown on right in below screen
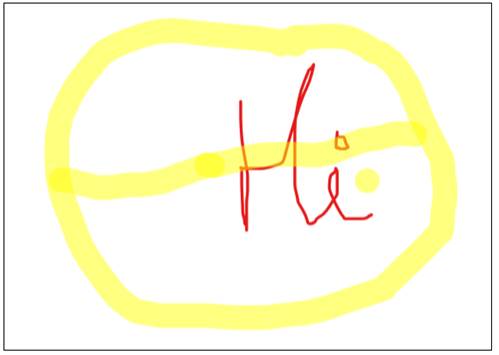
Below screen shows use of Pen draw and Highlighter draw on Whiteboard
Erase
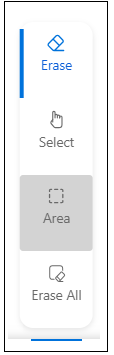
‘Erase’ lets you remove the visuals entirely, or through point-by-point or select an object and erase it. Erase menu can be accessed by clicking on Erase icon in whiteboard that has all above options.
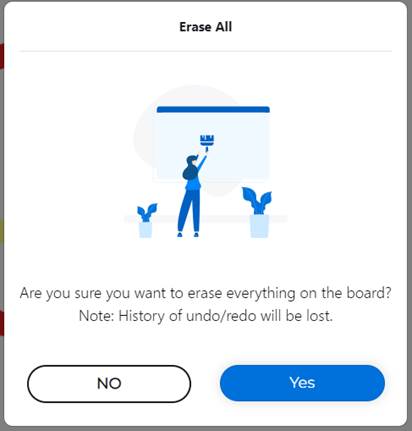
Erase All will show alert to user before erasing all content from current page.
Select
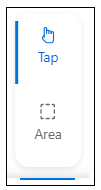
Choose any object on whiteboard to bring up context-specific menu operations. Object selection can be activated by clicking on Select icon in dashboard to open menu that has tap icon to be selected.
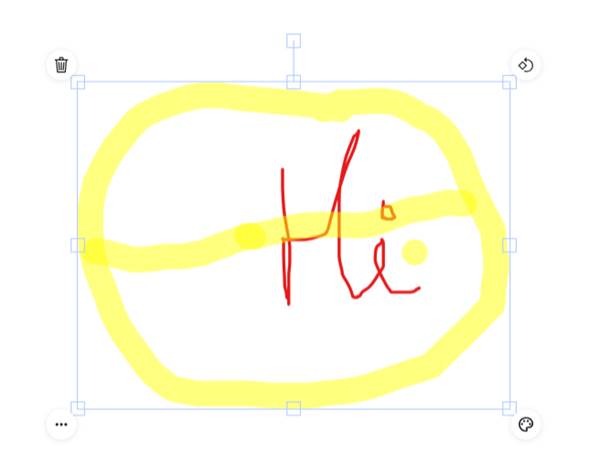
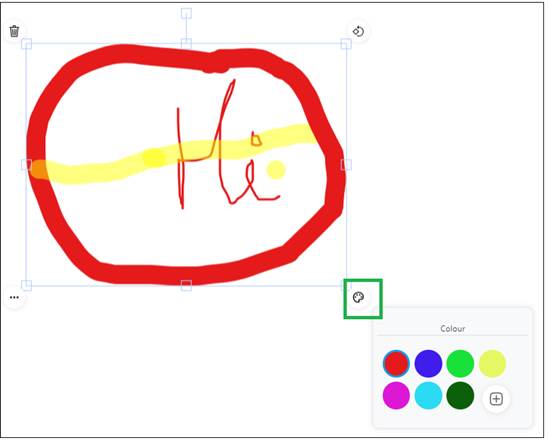
On selecting any object on whiteboard it will display context menus on 4 corners of bounding box as depicted.
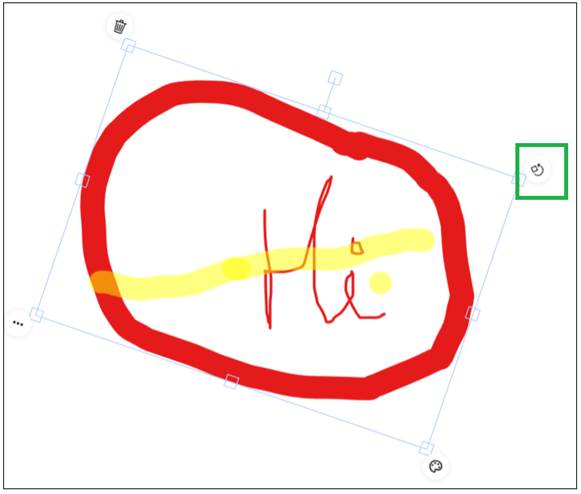
Example of object after rotation using rotate icon and dragging it in clockwise or anti-clockwise direction.
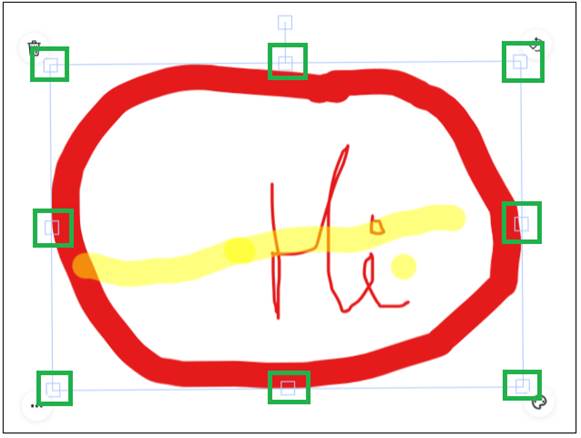
8 boxes depicted on Bounding box can be used to resize any object.
Clicking on fill color icon for Draw object show color palette that can then be used to change color of pen/highlighter
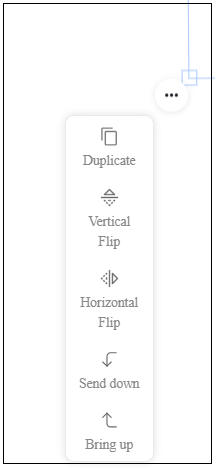
Clicking on Three dots icon shows context menu used to duplicate the object, flip object vertically, flip the object horizontally, send object to back, bring object to front.
Type text
Type down the ‘Text’ you need, style it. Text type can be activated by clicking on Type icon
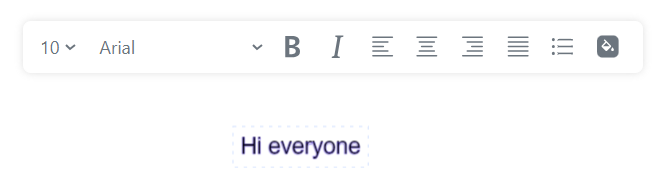
When text typing is being done on device then On screen keyboard (OSKB) is shown. OSKB is not shown when text typing is done on PC/Laptop browser.
It shows additional menu options for text styling to change font size, font style, Bold, Italics, paragraph alignment, list/bulleting, font color changing Insert Menu
You can insert shape, Image, Video, 3D object, Audio, Document to Whiteboard using following menu options
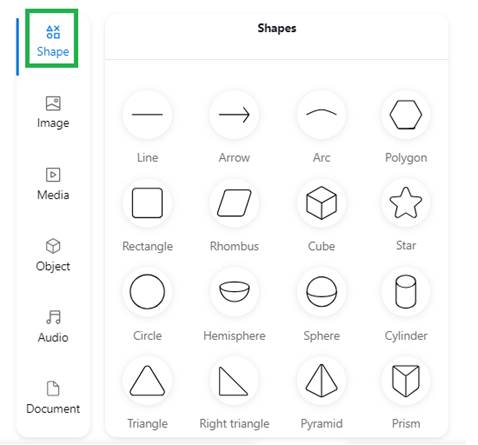
Insert Shapes
Shape menu can be seen by clicking on Shape icon in Insert menu. You can select following shapes from Shape menu and insert to whiteboard
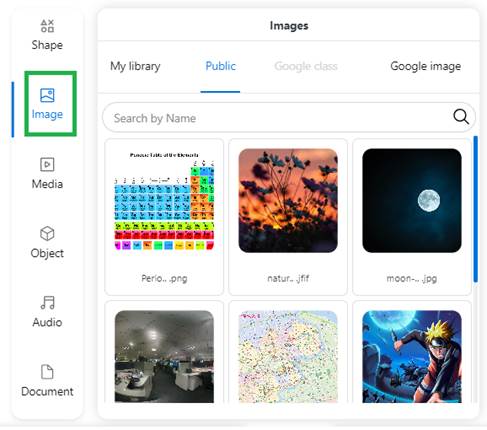
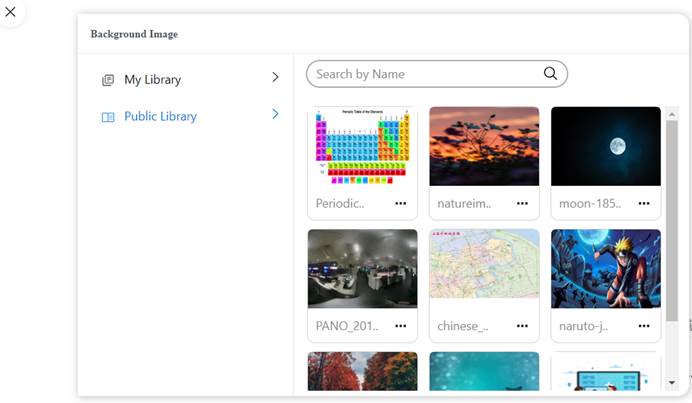
Insert Images
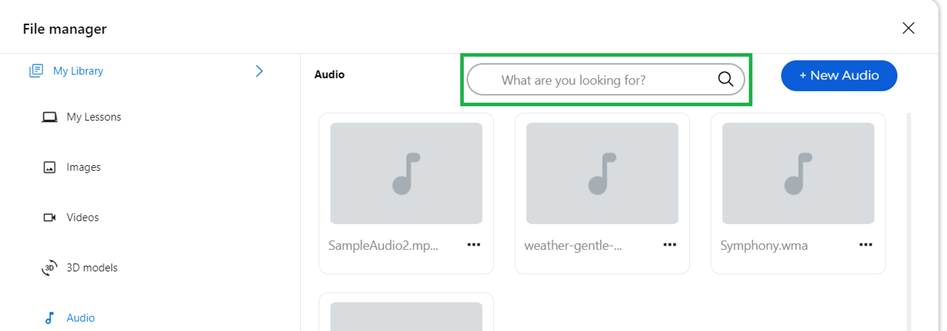
Image menu can be seen by clicking on Image icon in Insert menu. You can select an image by clicking on any image that are available in My library and Public library.
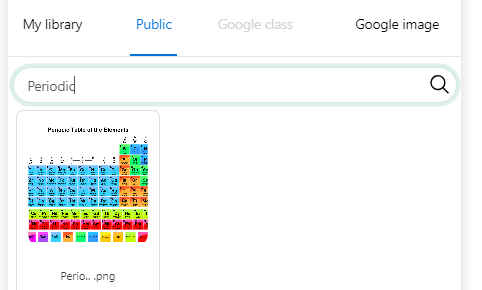
Image can be searched from My library and Public library by file name
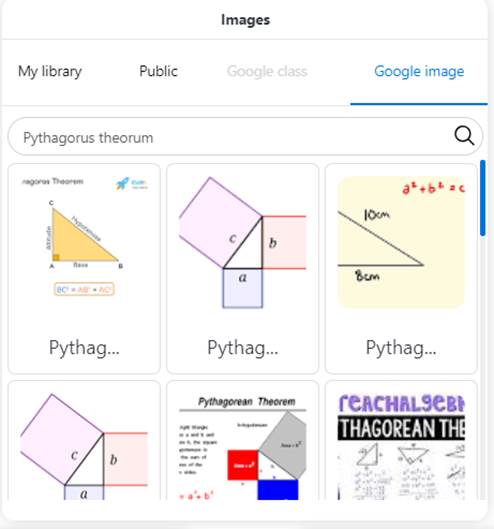
Images can be searched from Google by typing search string under Google Image sub-menu. Search results are shown as thumbnails and on clicking any thumbnail from search result will insert image to whiteboard
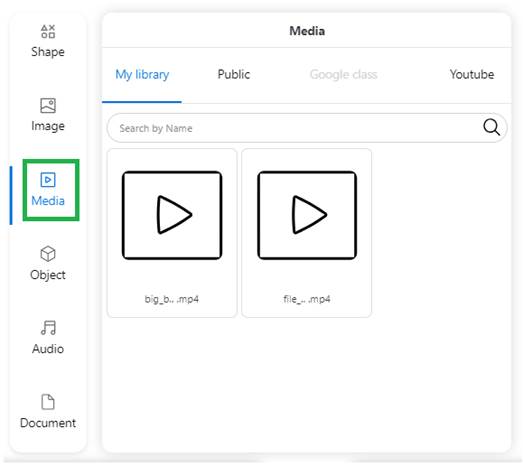
Media: Video
and Youtube
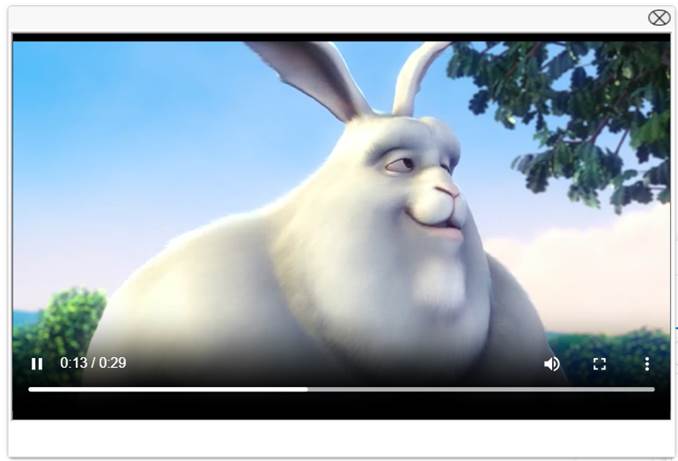
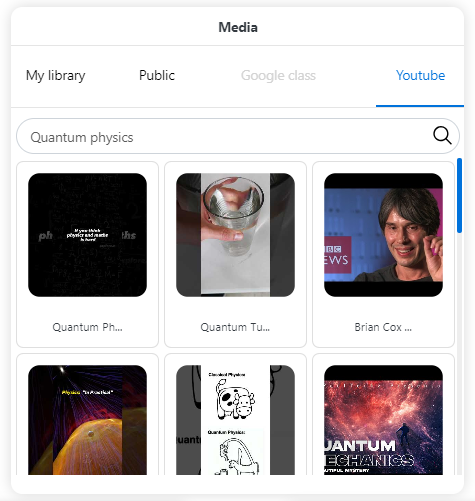
Media menu can be seen by clicking on Media icon in Insert menu. You can select a Video by clicking on any video thumbnail that are available in My library and Public library. Video can be searched from My library and Public library by file name
Selected video will start playback in I-frame. Video can be paused/resume, audio can be muted/unmuted, video can be made full-screen. Playback bar is shown for video playback to indicate current playback position. Video playback position can be changed by clicking on playback bar. Current playback position is shown and total duration of playback is shown.
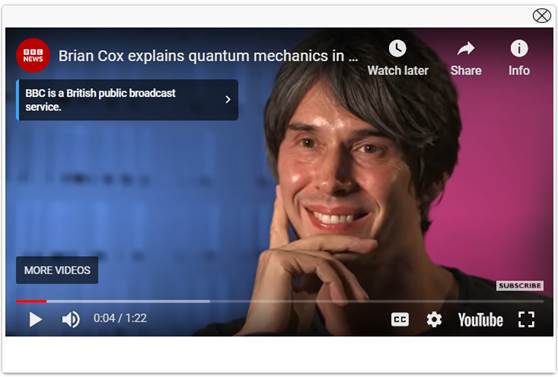
At any time only one video playback can be done. Youtube Video can be searched from Youtube under Youtube sub-menu. Youtube search results based on entered text for search are shown as thumbnails. You can select Youtube video by clicking on thumbnail.
Youtube playback happens in I-frame and all controls available for any Youtube video playback are shown.
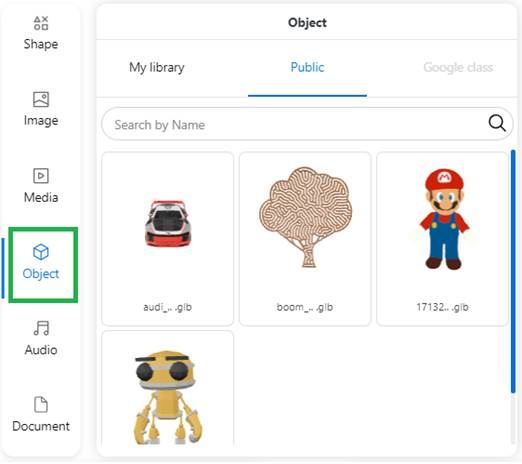
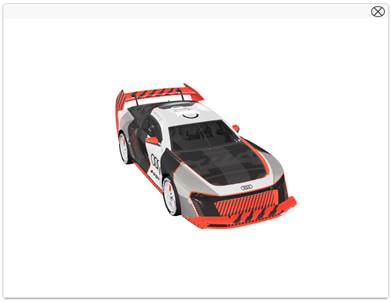
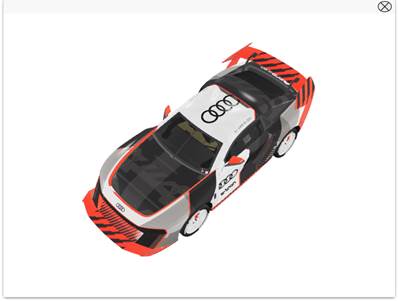
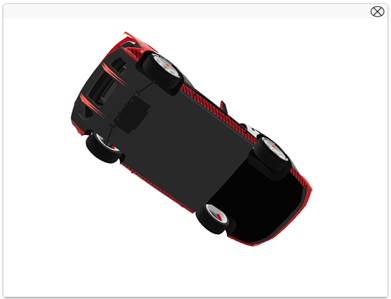
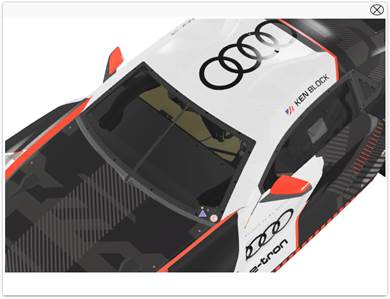
At any time only one Youtube video playback can be done. Objects: 3D
3D objects menu can be seen by clicking on Object icon in Insert menu. You can select a 3D object by clicking on any thumbnail that are available in My library and Public library. 3D object can be searched from My library and Public library by file name
Note: loading of 3D object can take time and progress bar for each thumbnail is shown. Selected 3D object is shown in I-frame. You can interact with 3D object to rotate it around any axis. You can zoom-in/zoom-out inside 3D object. Following screens explain with an example.
At any time only one 3D object rendering can be done. Audio
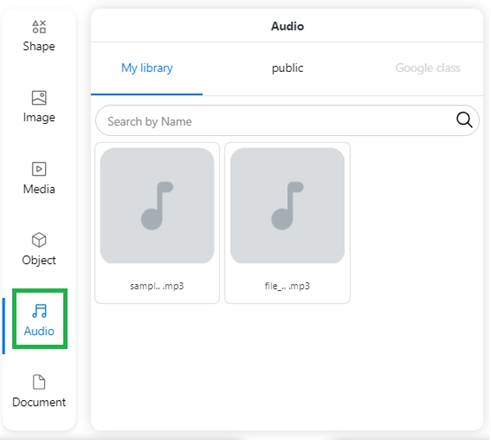
Audio menu can be seen by clicking on Audio icon in Insert menu. You can select an audio file by clicking on any thumbnail that are available in My library and Public library. Audio file can be searched from My library and Public library by file name
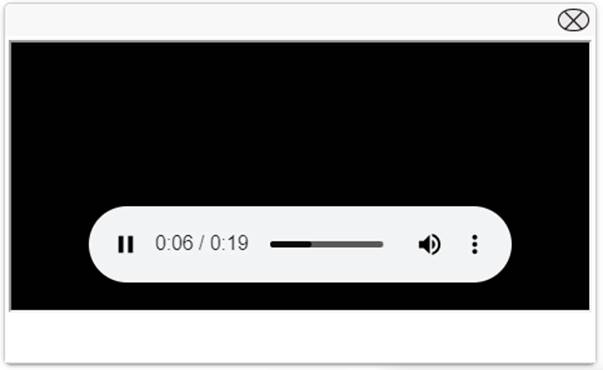
Audio playback happens in I-frame. You can pause/resume audio. You can mute/unmute audio. Playback progress bar is shown and you can change playback position by clicking on playback progress bar. Current playback position is shown and total duration of playback is shown.
At any time only one Audio playback can be done. Documents
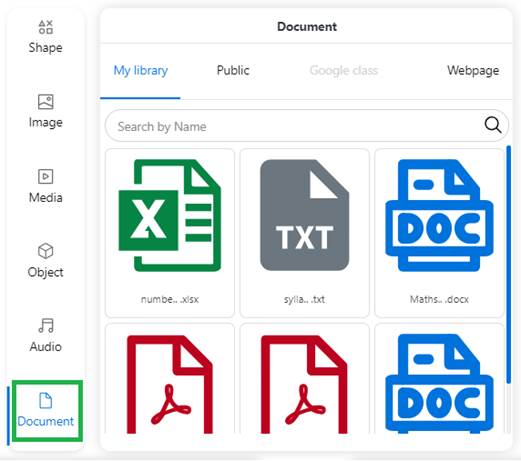
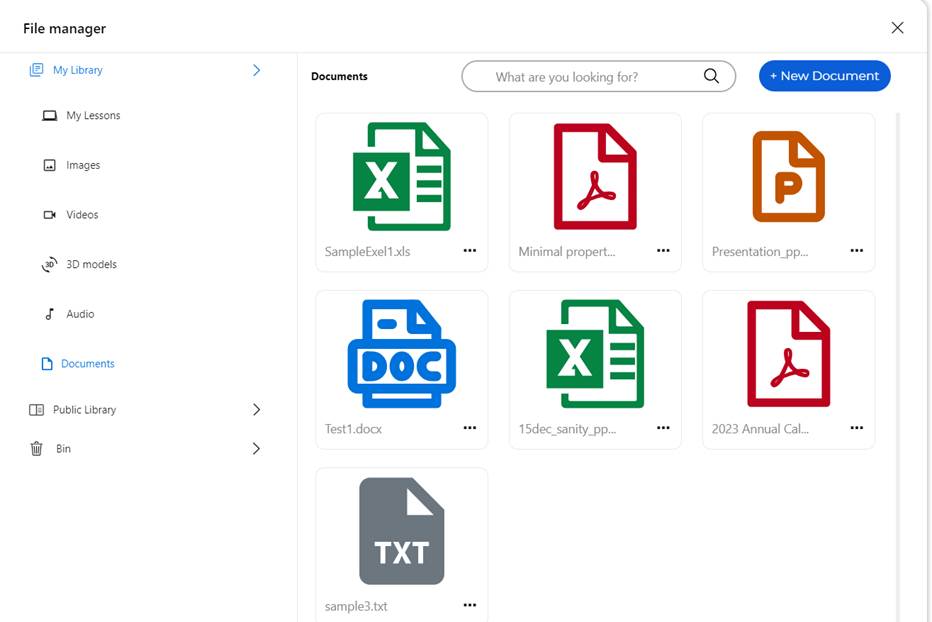
Document menu can be seen by clicking on Document icon in Insert menu. You can select a document by clicking on any thumbnail of document that are available in My library and Public library. Document can be searched from My library and Public library by file name. Document format supported are Excel, Word, Powerpoint, TXT and PDF files.
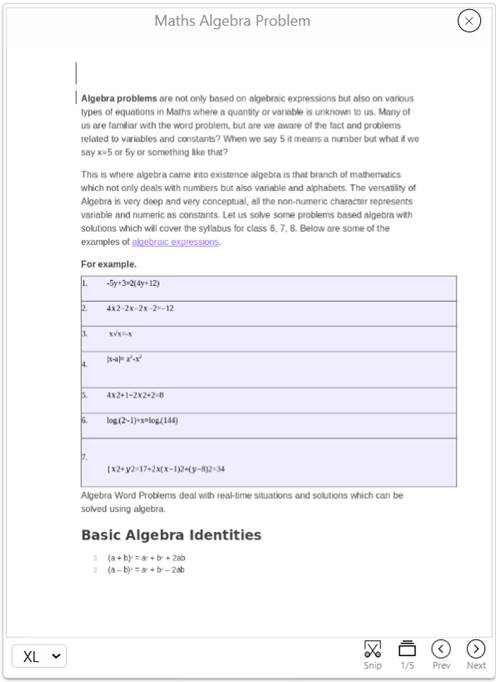
Selected document will be displayed I-frame and document pages can be navigated
Documents can be viewed in different sizes using dropdown box for size as depicted below. Document pages can be navigated by clicking on Prev and Next icons as depicted below. Document page can be snipped and can be inserted as image in Whiteboard as depicted below .
Documents can be viewed as grid view using Grid icon to show overview of all pages as depicted below.
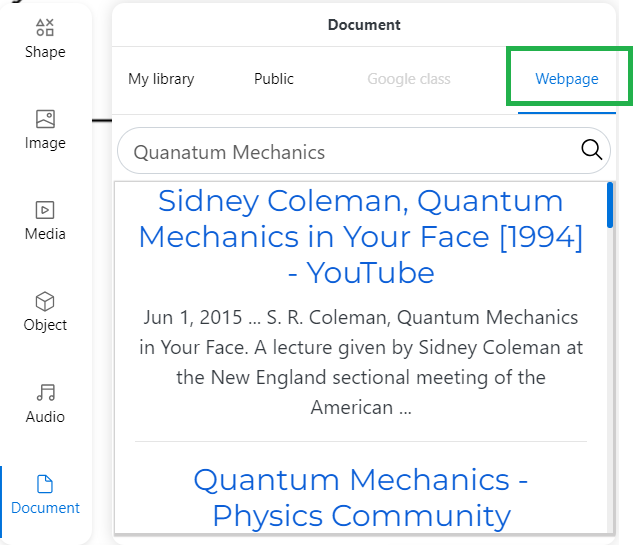
Webpages
Webpages can be searched by clicking on Wepage button and then providing search text to search for. Search results are shown in list view and each list item is clickable to open webpage as I-frame.
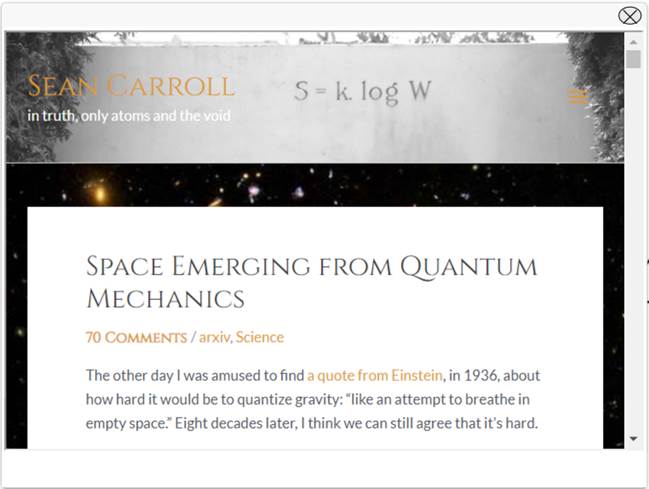
Web page opened as I-frame can be navigated by user. Web page can be oved around over Whiteboard.
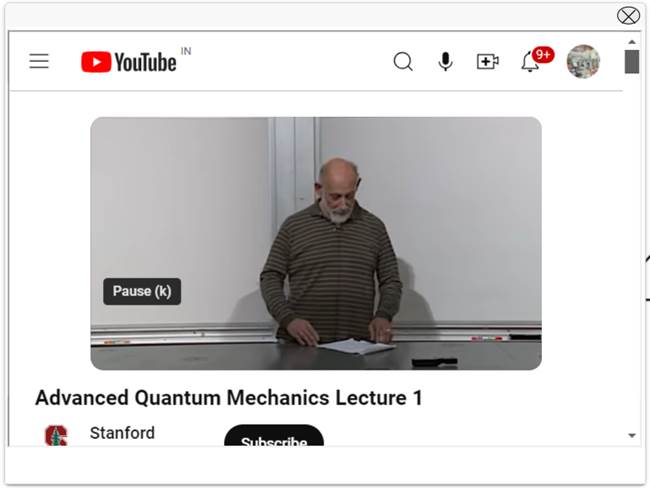
Note it will only allow one web page to be opened at any point of time. Web link content could also be Youtube or Video link that can then be played as I-frame.
Undo/Redo
Allows to undo the last operation on whiteboard object or redo the last undo action for whiteboard object Undo operation can be performed by clicking on Undo icon and Redo operation can be performed by clicking on Redo icon
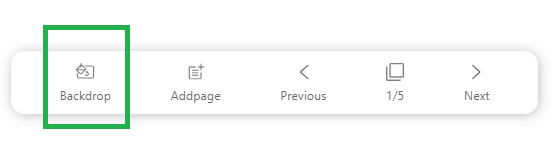
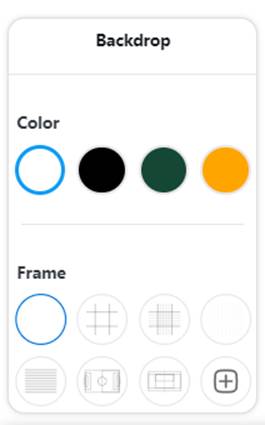
Backdrop
At any point of given time, easily change the overall Backdrop’s ‘Color’ and ‘Pattern’ depending on the nature of the content. Backdrop menu can be activated by clicking on Backdrop icon in Whiteboard.
You can select predefined colors and select predefined patterns from menu shown below
You can also select image as backdrop that you have uploaded to My Library or select an image from Public Library
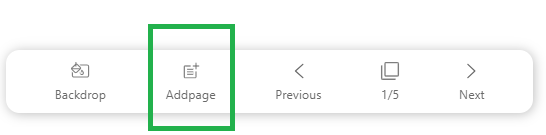
Page Management
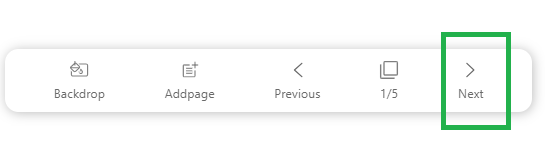
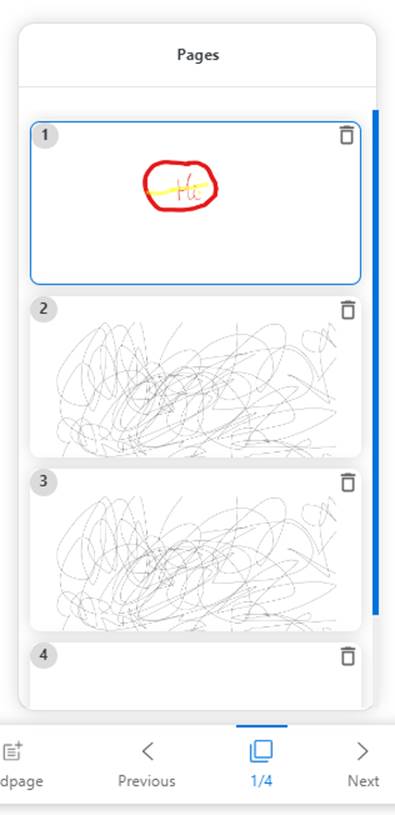
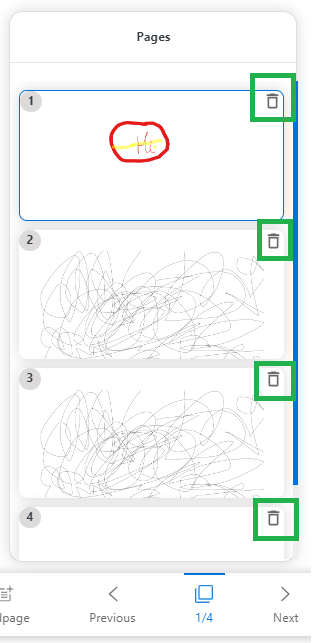
Add different pages for presenting, and navigate between them during different segments of the Lesson. Preview the pages and navigate to page by clicking on page. Allow to delete a page from page preview. New page to current lesson can be added by clicking on Addpage icon in Whiteboard. After adding page whiteboard will show new page.
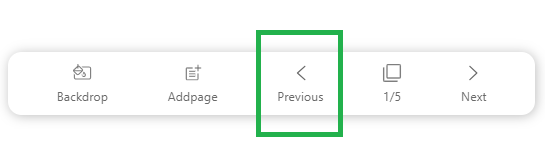
You can navigate to previous page in Whiteboard by clicking Previous icon in Whiteboard
You can navigate to Next page by clicking Next icon in Whiteboard
You can preview all pages by clicking Page preview icon in Whiteboard
Page preview icon also indicates total pages and current page number.
Page can be deleted by clicking on Delete icon shown over thumbnail for each page.
|


Advanced Tools
·
Geometry
o
Ruler
o
Compass
o
Protractor
o
Setsquare
·
Calculator
·
Voting
|
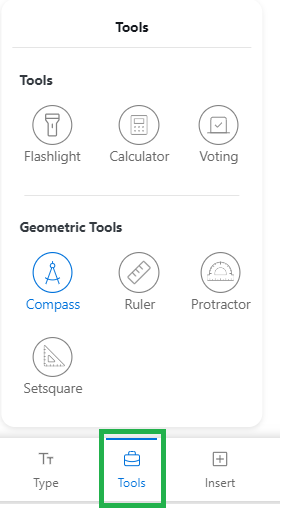
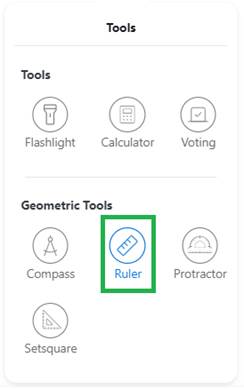
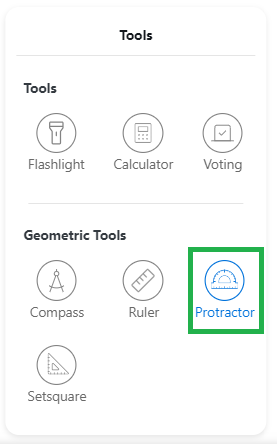
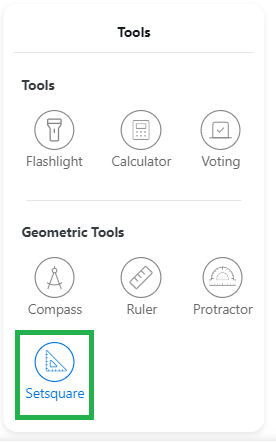
Tools
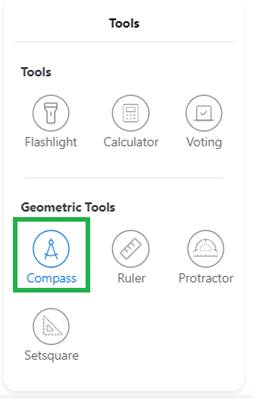
It supports teacher assistant tools like Geometry tools and Calculator and Voting tool. It can be brought up on whiteboard by clicking on Tools icon on Whiteboard.
Geometry tools
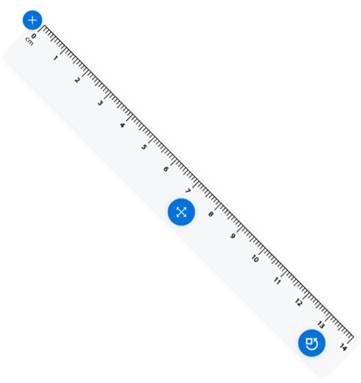
It supports Ruler, Compass, Protractor and Set-square Geometry tools that can be used by teacher. Ruler
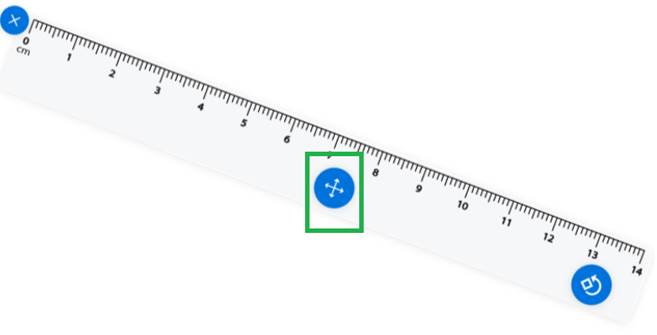
Ruler support to draw lines on Whiteboard. Ruler tool can be brought by clicking on Ruler icon present in Tools menu which then shows Ruler as depicted below.
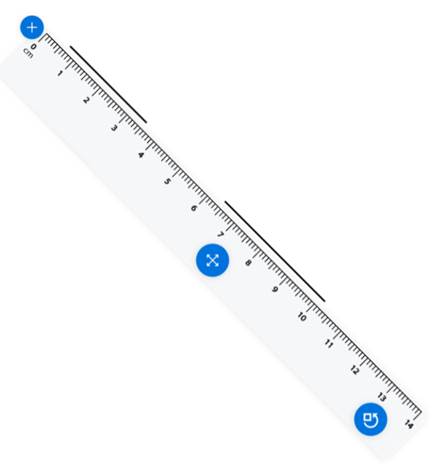
Lines can be drawn by drawing along markings. Multiple line segments can be drawn along markings as depicted below.
Ruler
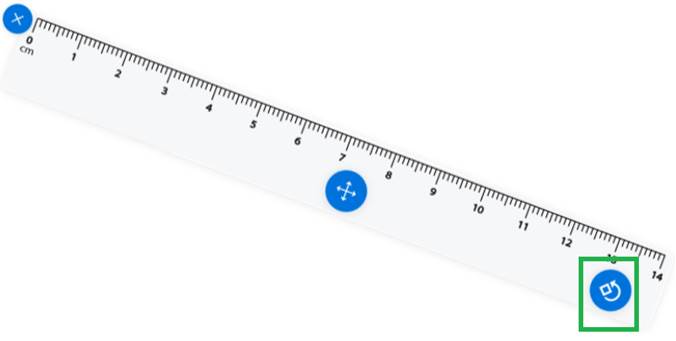
can be rotate around rotate icon and then lines can be drawn.
Ruler can be moved around the Whiteboard using Move icon and then lines can be drawn
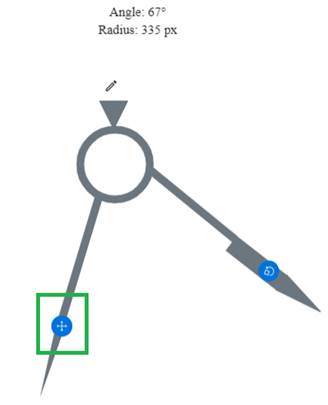
Compass
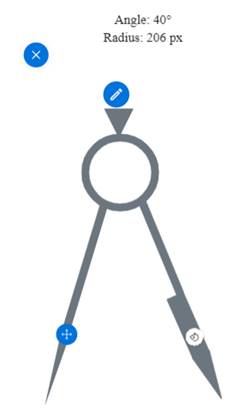
Compass support to draw arc and circles on Whiteboard. Compass tool can be brought by clicking on Compass icon present in Tools menu which then shows compass as depicted below.
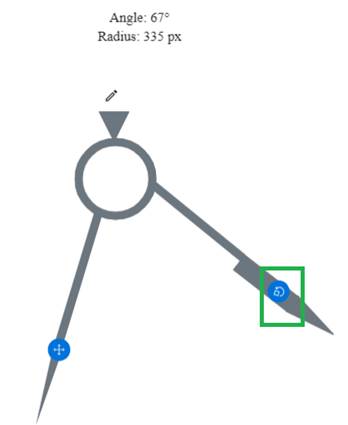
Compass radius can be changed by dragging icon on right side.
Compass can be moved around on Whiteboard using move icon on left side of compass
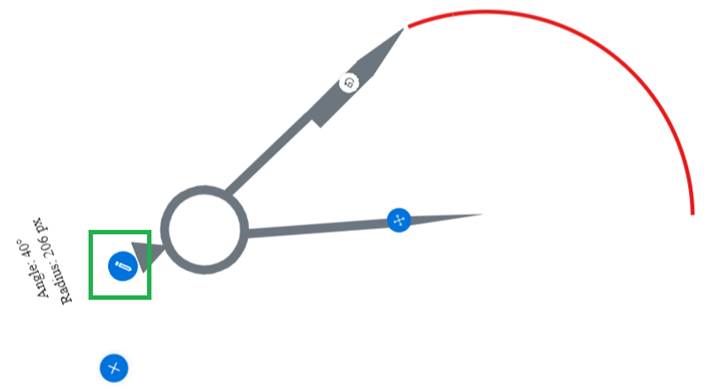
Arcs and circles can be drawn by moving draw icon in clockwise or anti-clockwise direction.
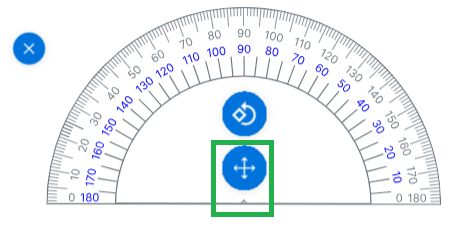
Note that operations can be done by clicking on desired icon to make it activated and then perform operation. Protractor
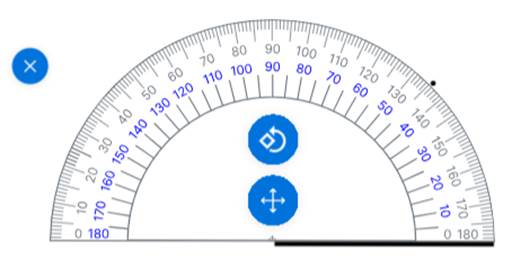
Protractor supports to draw lines measuring angles on Whiteboard. Protractor tool can be brought by clicking on Protractor icon present in Tools menu which then shows Protractor as depicted below.
Protractor can be moved around on Whiteboard using move icon
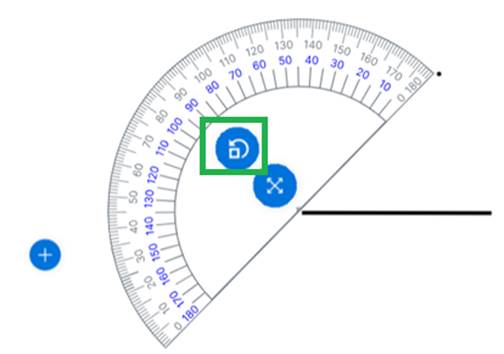
To draw 2 lines at certain angle, say 45 degrees then these steps need to be followed Step 1 Draw base line and mark point at 45 degrees
Step2 Rotate protractor
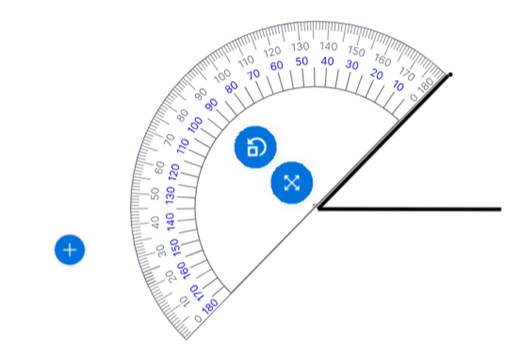
Step 3 Join base of line and point
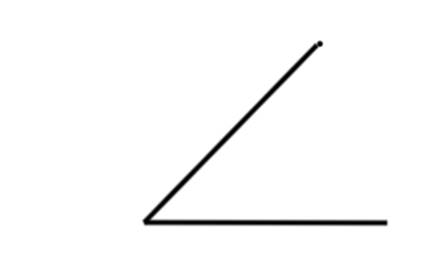
Step 4. Remove Protractor to have following constructions
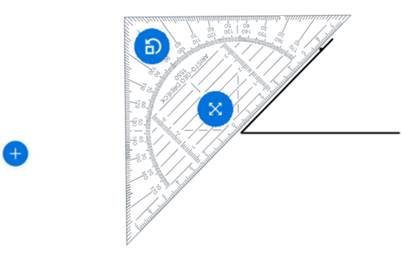
Set-square
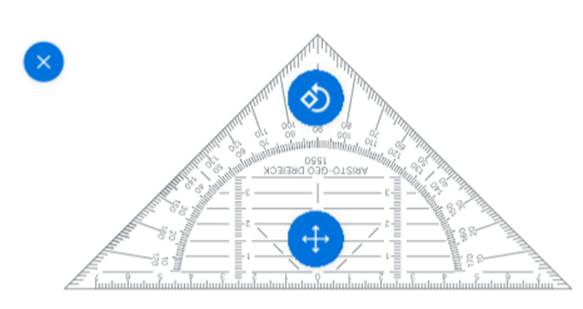
Set-square supports to draw lines measuring angles on Whiteboard. Set-square tool can be brought by clicking on Setsquare icon present in Tools menu which then shows Set-square as depicted below.
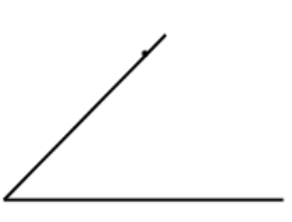
To draw 2 lines at certain angle, say 45 degrees then these steps need to be followed Step 1 Draw base line and mark point at 45 degrees
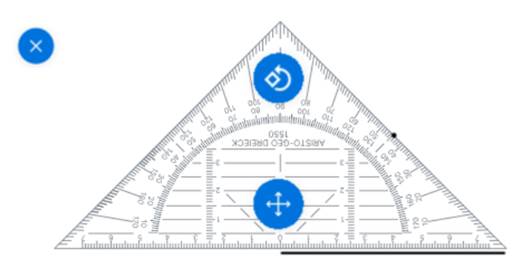
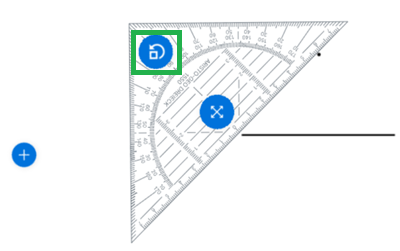
Step2 Rotate set-square
Step 3 Join base of line and point
Step 4. Remove Set-square to have following constructions
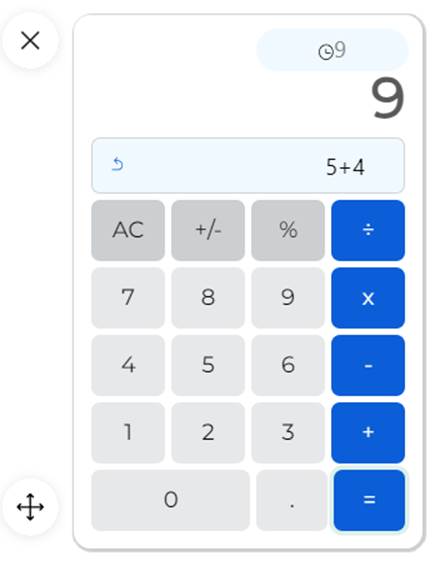
Calculator
It allows to perform mathematical non-scientific calculations.
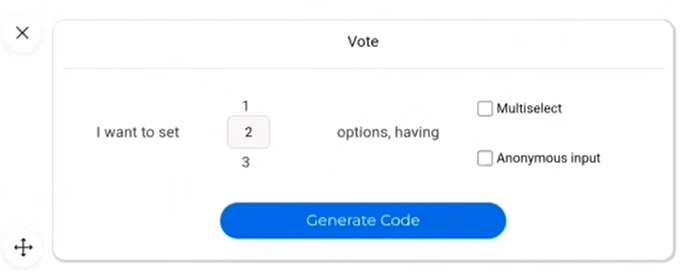
Voting
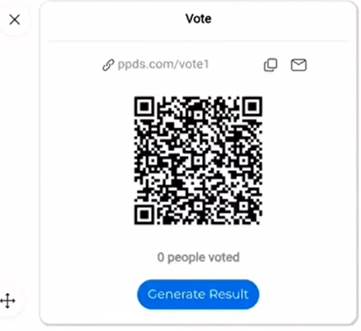
It allows for teacher to generate instant vote for students to respond to a question or survey. Step1: Teacher prepares option for vote based on question written on screen. Options can be multi-select or single select
Step2: Teacher then generates QRcode that can scanned by students on their mobile devices to get access to voting options
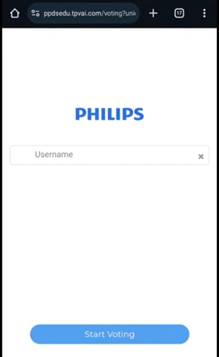
Step 3: Each student who wants to vote scans QRcode using mobile phone camera to get a weblink where voting can be done.
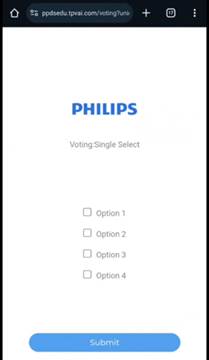
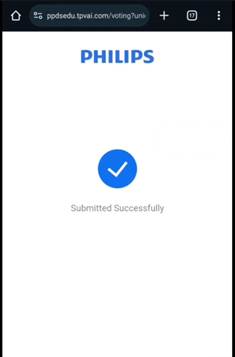
Step4: Student enters their name of page. Student then marks option based on option generated for this vote. Student then submits vote.
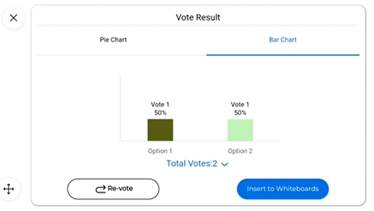
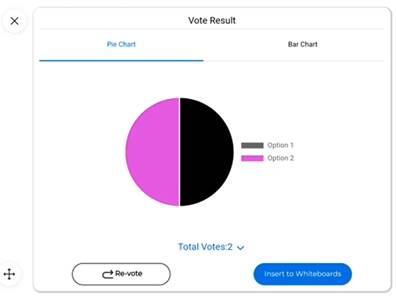
Step5: Once votes are getting submitted then teacher on Whiteboard can view vote results in Bar chart format or Pie Chart format to see which option got how many votes.
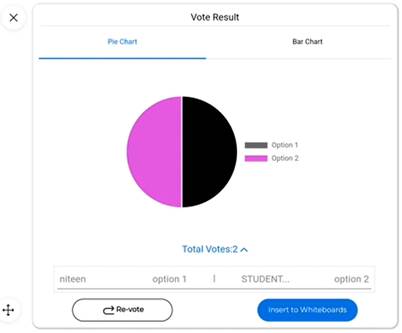
Step6: Teacher can also view which student opted for which option
Results obtained can also be inserted to Whiteboard in the form of pie chart or bar chart. Note: There is also option to perform re-vote. |


File Manager
·
Lessons
o
My Library
o
Public Library
·
Content
o
Images
o
Videos
o
3D Models
o
Audio
o
Documents
|
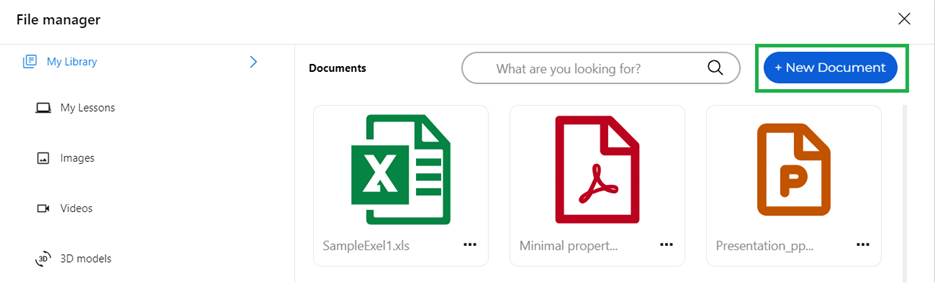
File Manager for Lessons and Content
Management
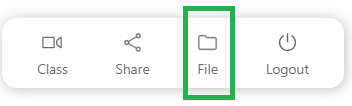
File Manager menu can be shown over Whiteboard by clicking on File icon.
Lesson Management
Lesson management is based on scope of access to files inside My Library and Public Library.
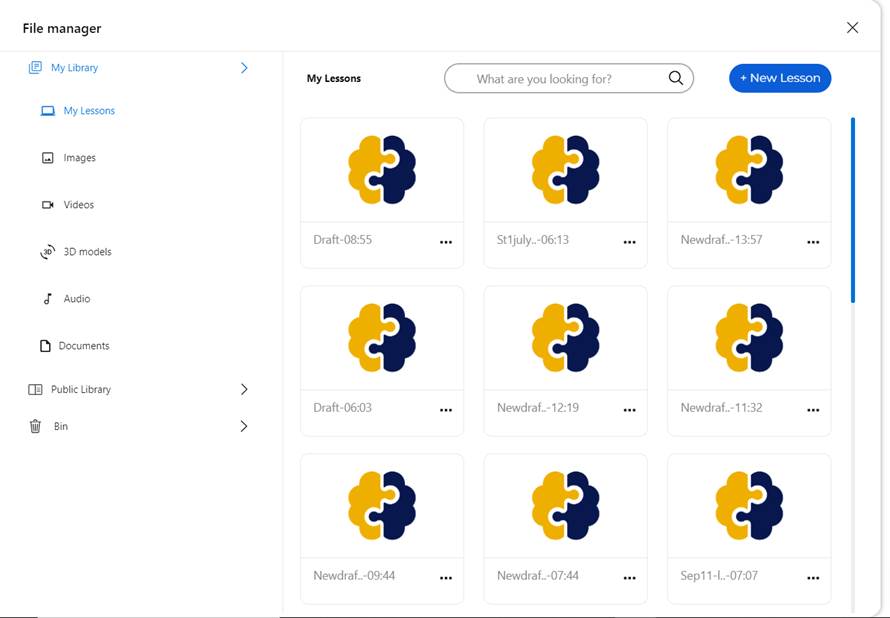
My Library
Lessons create on Whiteboard are saved to cloud belonging to logged in user and are displayed under My library -> My Lessons menu. Scope of these lessons are limited to logged in user.
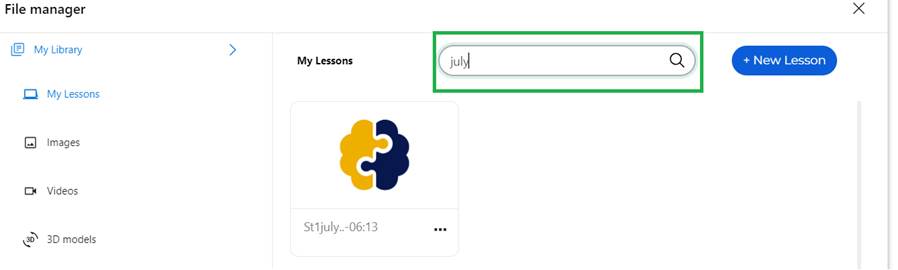
Lessons can be searched by Filename using Search box
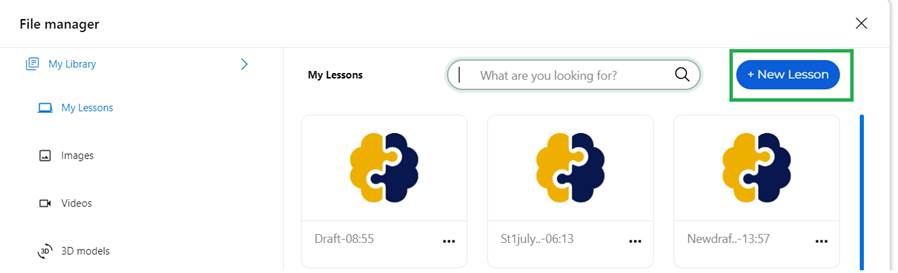
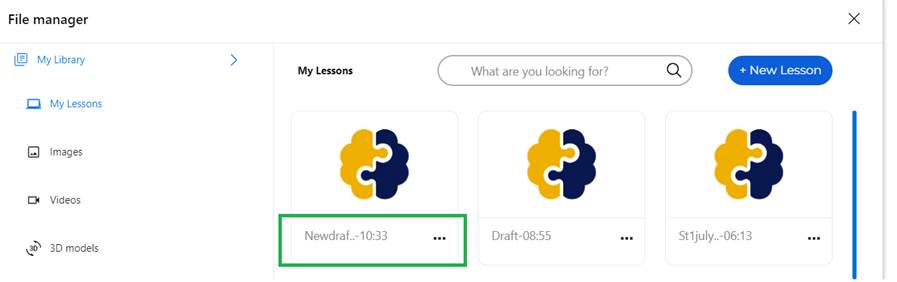
New lesson can be created by clicking on New Lesson button
It will create new draft file and will be depicted in lesson list
Public Library
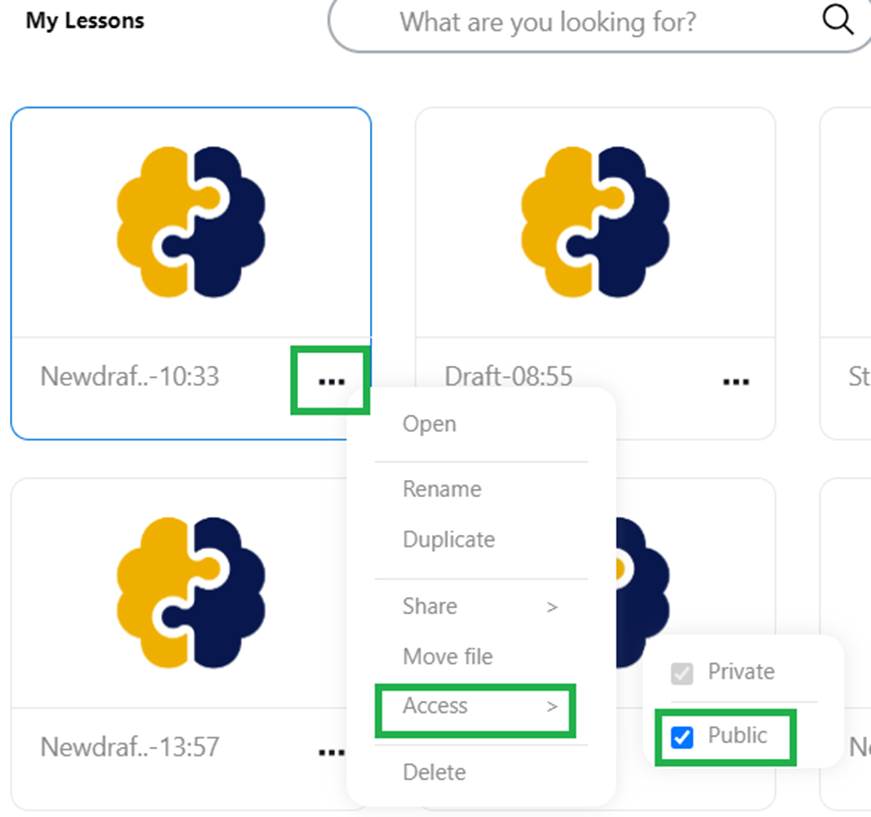
Lesson from My Library can be made accessible to everyone by making it part of Public Library. This can be done through context menu of any lesson as depicted below
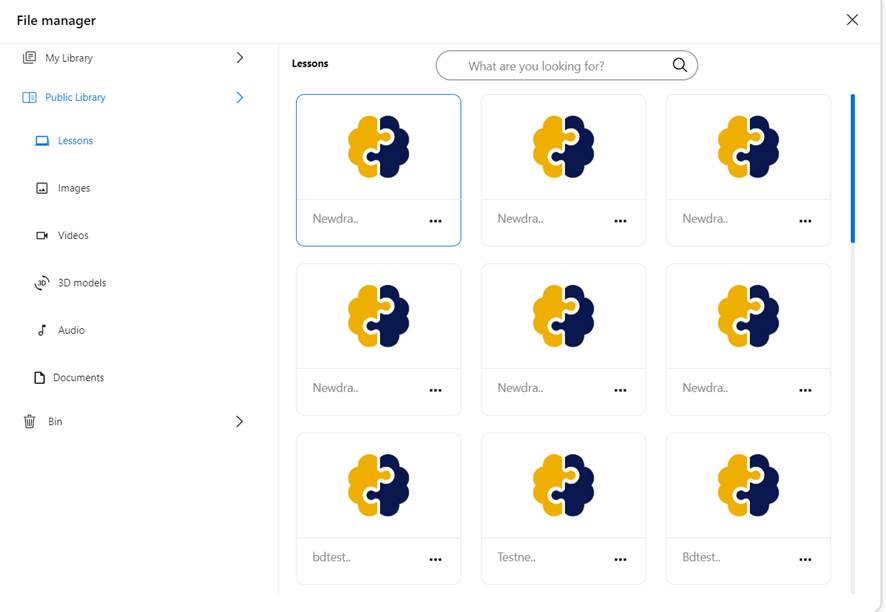
Once the lesson is made public then it will be listed in File Manager > Public Library -> Lessons menu as depicted below
Owner of Public Lesson can again change scope back to Private so that it is not accessible to Public. Note: 1. Admin users also have rights to change access level of file. 2. Same rule applies for content where uploaded content is part of My Library and then logged in user can make content as public. 3. Creation of lesson and uploading of content can be done as part of My Library and not as part of Public Library. Content Management
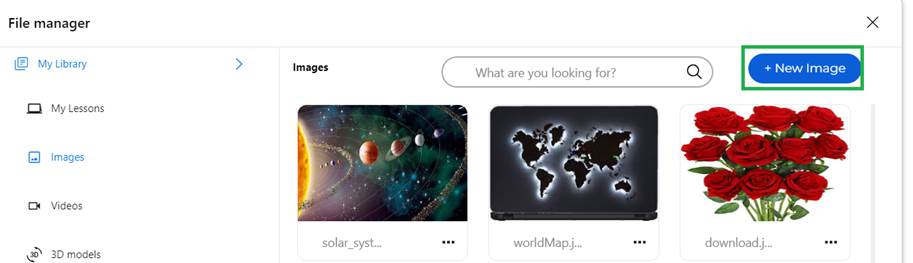
Images
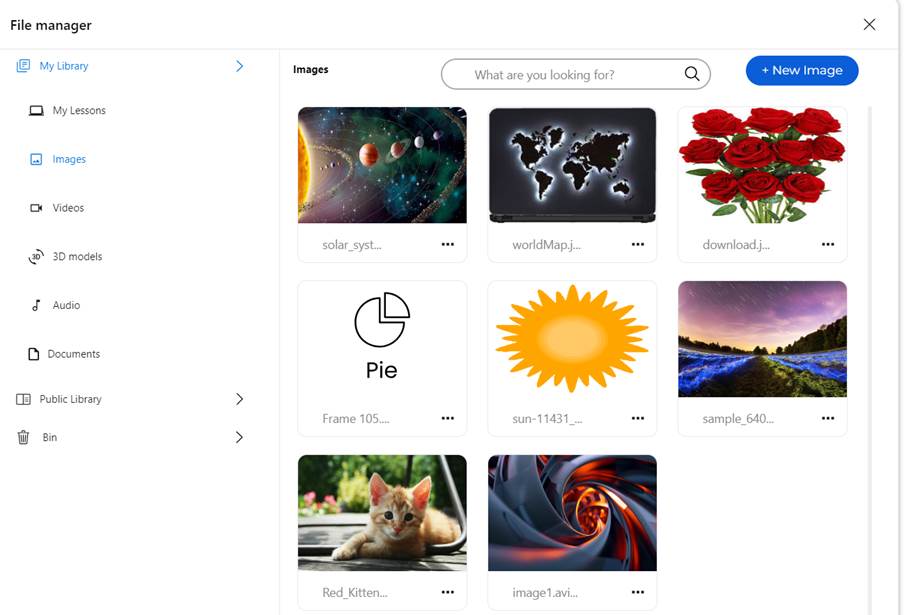
Uploaded Images are listed under My Library->Images.
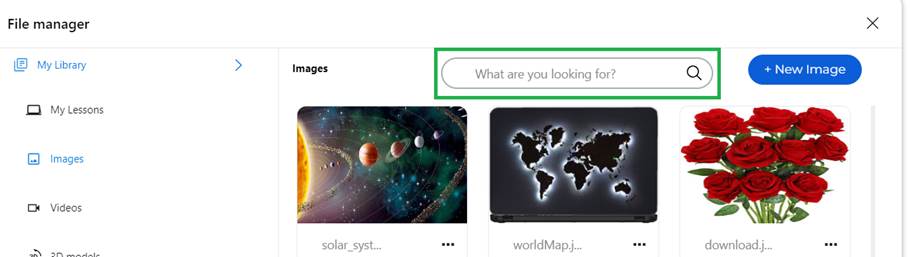
Image can be searched by file name using search box as depicted below
New image can be uploaded from Device or from PC/Laptop using button.
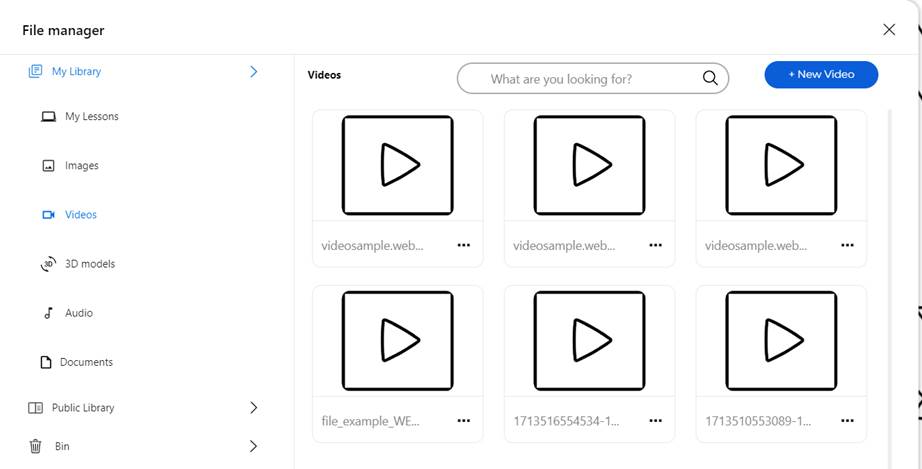
Image can be inserted into Whiteboard by clicking on thumbnail. Image can be made public and then it is available to everyone under File Manager > Public Library > Images Videos
Uploaded videos are listed under My Library->Videos.
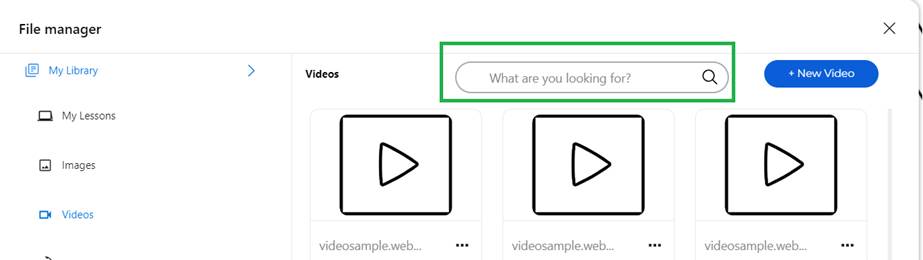
Videos can be searched by file name using search box as depicted below
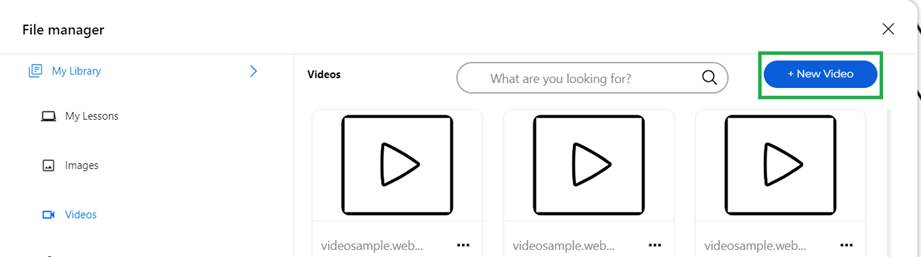
New video can be uploaded from Device or from PC/Laptop using button
Video playback can be started by clicking on thumbnail. Video can be made public and then it is available to everyone under File Manager > Public Library > Videos 3D models
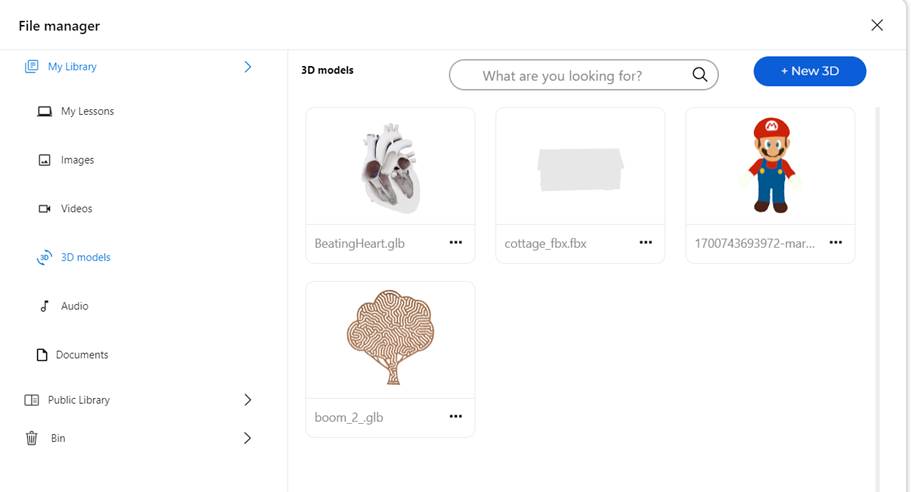
Uploaded 3D files are listed under My Library > 3D models.
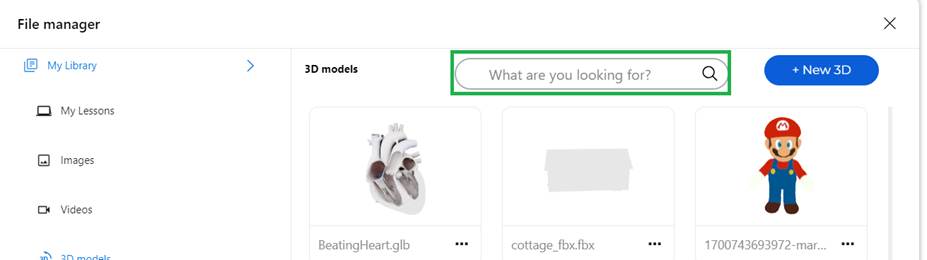
3D models can be searched by file name using search box as depicted below
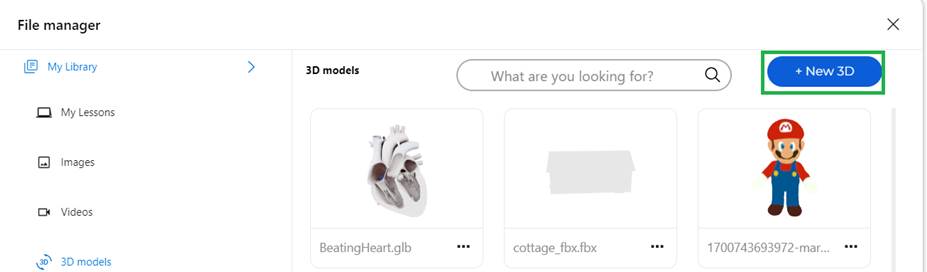
New 3D model/object can be uploaded from Device or from PC/Laptop using button
3D model can take time to upload and progress of upload is indicated
by progress bar as depicted below.
3D object rendering can be started by clicking on thumbnail. 3D model/object can be made public and then it is available to everyone under File Manager > Public Library > 3D models Audio
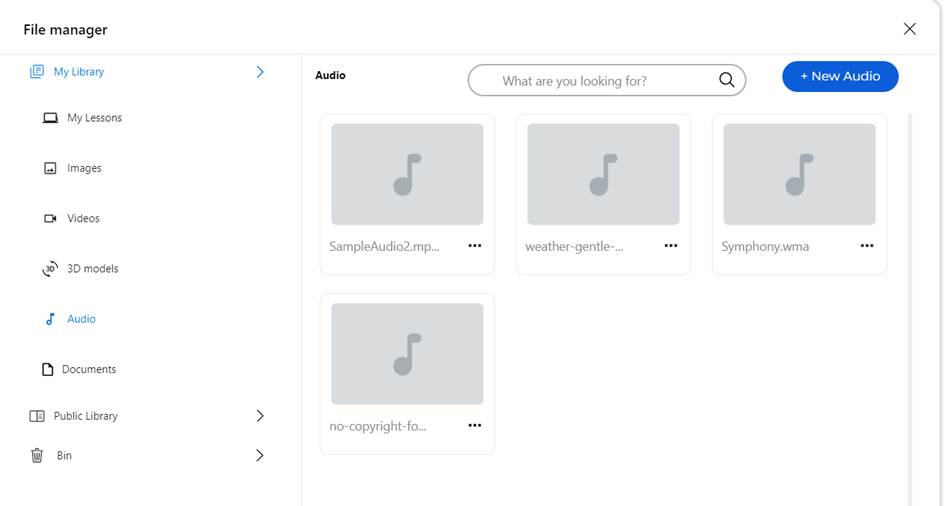
Uploaded audio files are listed under My Library > Audio.
Audio file can be searched by file name using search box as depicted below
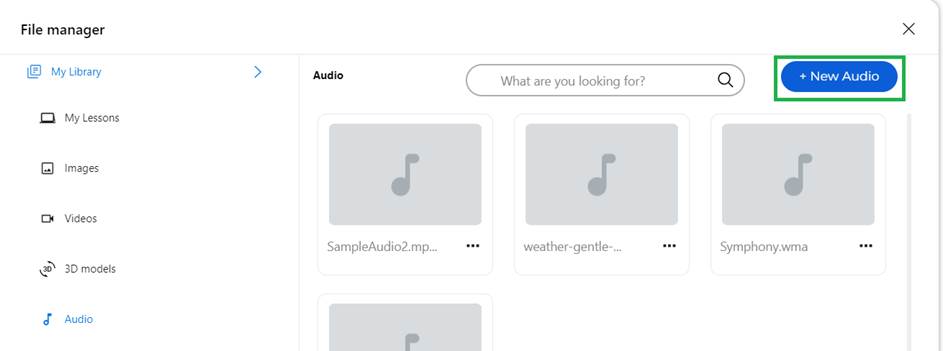
New Audio file can be uploaded from Device or from PC/Laptop using button
Audio file playback can be started by clicking on thumbnail. Audio file can be made public and then it
is available to everyone under File
Manager > Public Library > Audio Documents
Uploaded documents are listed under My Library > Documents.
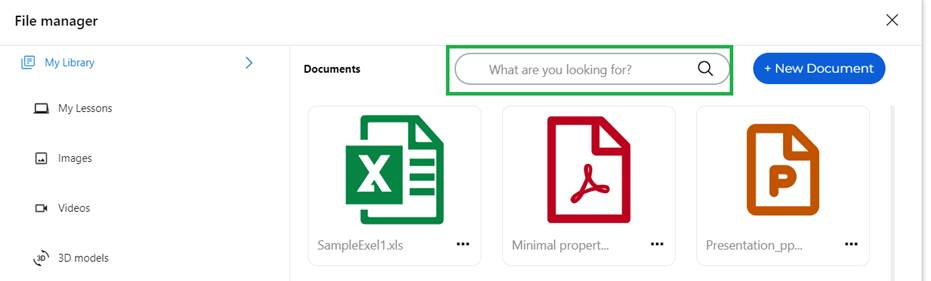
Documents can be searched by file name using search box as depicted below
New document can be uploaded from Device or from PC/Laptop using button
Document viewing and navigation can be started by clicking on
thumbnail. Document can be made public and then it
is available to everyone under File
Manager > Public Library > Documents |

Share
· QRCode· Copy Link·
Google
Classroom
|
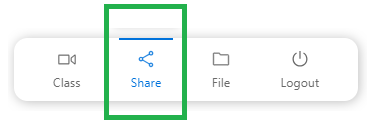
Share
Menu
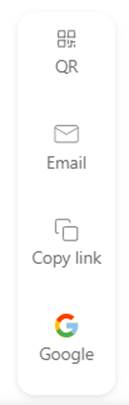
Share menu can be accessed by clicking on Share icon in Whiteboard which then brings menu shown on Right side.
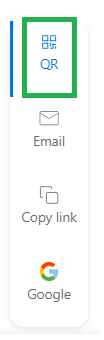
Sharing of lesson can be done via QRCode, Email, Copy Link and share to Google Classroom. Share by QRCode
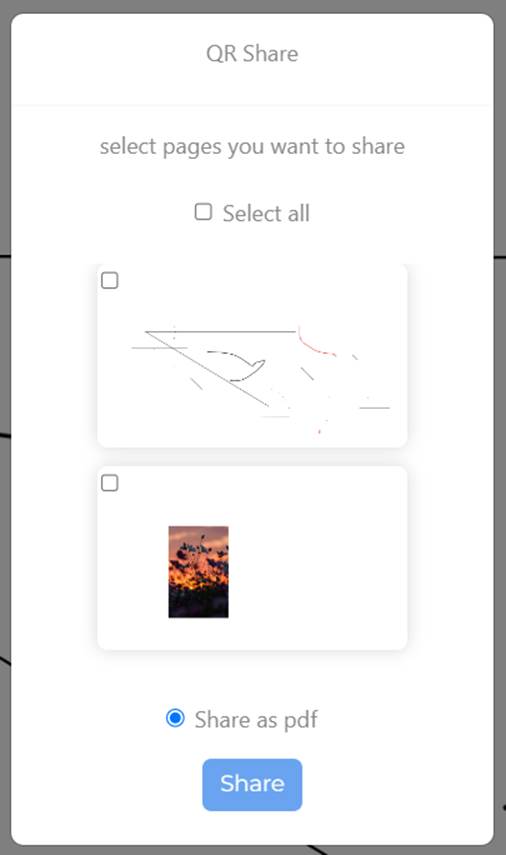
Feature can be enabled by clicking on QR icon in Share menu which will then show below screen.
User can select one or more pages that need to be shared which will then be bundled into PDF file.
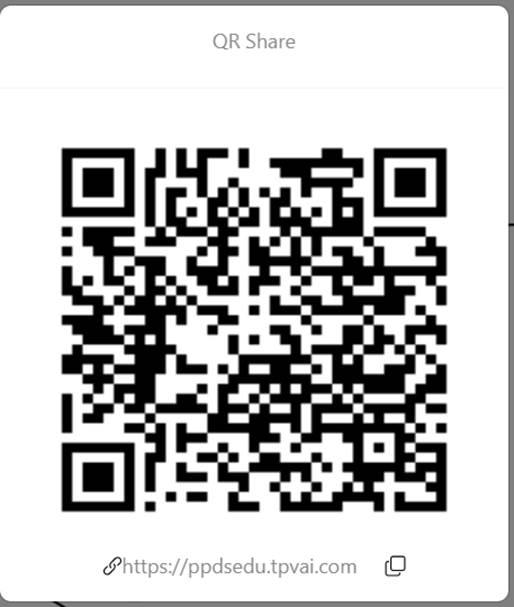
It will then show QRcode that can be scanned using mobile phone camera to get link to PDF file containing selected lesson pages.
Share by Email
Feature can be enabled by clicking on Email icon in Share menu.
This will show screen with option to select the pages. After selection you can proceed to send mail having PDF file containing selected lesson pages. Note: Recipient emails should have been configured for user by Admin in Admin portal.
Share by Copy Link
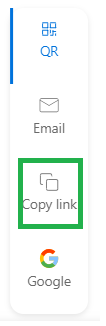
Feature can be enabled by clicking on Copy link icon in Share menu.
This will show screen with option to
select the pages. After selection you can proceed to copy link that provides
link of PDF file containing selected lesson pages. Share by Google
Classroom
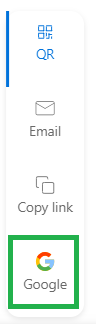
Feature can be enabled by clicking on Google icon in Share menu.
This will show screen with option to select the pages. After selection you can proceed to Google Classroom screen where you can provide PDF file containing selected lesson pages. Note that user needs to sign in to Google
account and user should have already access to Google Classroom. |

Collaboration tools
·
Virtual Classroom
·
Collaboration
|
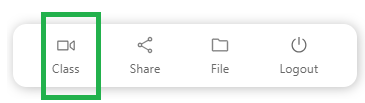
Virtual Classroom
Virtual Classroom allows teacher and students to interact over AV-Chat and Text Chat. Teacher can create virtual class by clicking on Class icon.
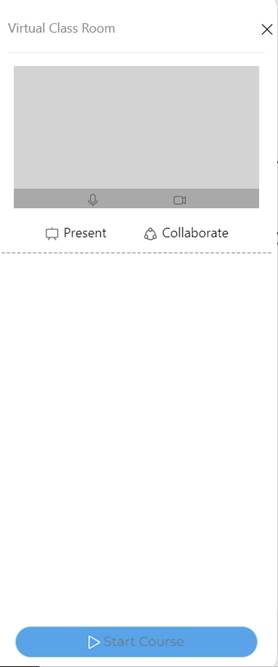
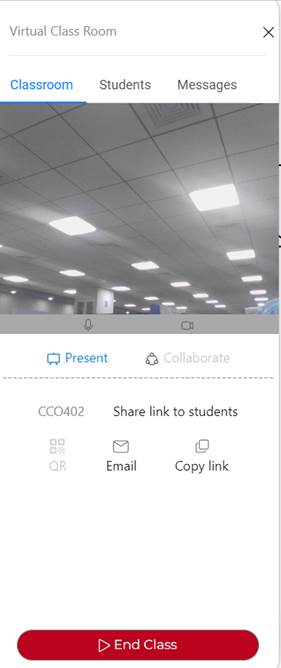
It will bring up below screen that allows to create virtual class and generate code for virtual class that can then be shared by email or copy link with students.
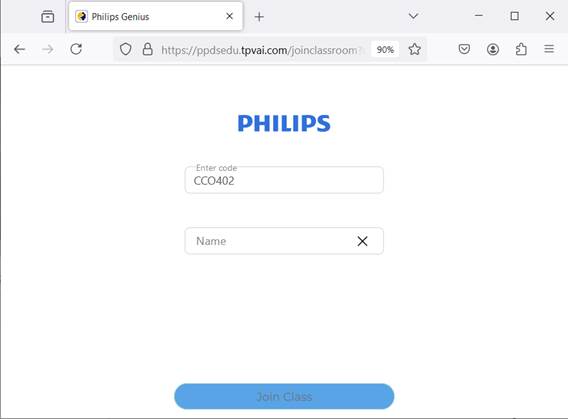
On Student laptop/PC browser: Student can use link to open page and join class after providing their name.
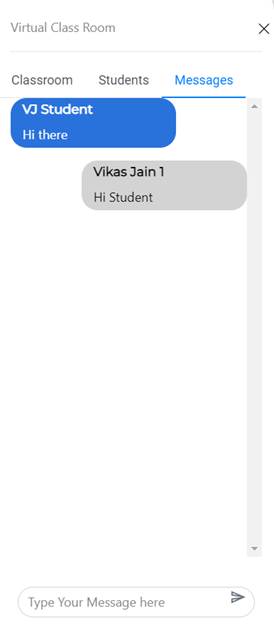
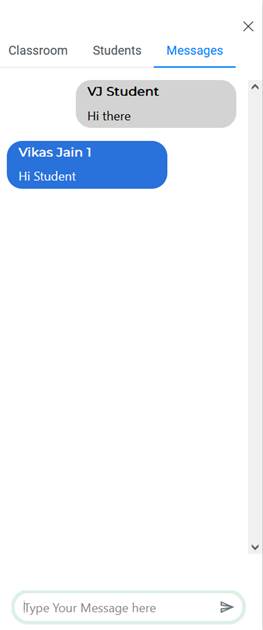
After joining, teacher can see student videos under Students tab. All students can view other student videos under Student tab. Student can view teacher under Classroom tab. Student needs to give required permission for Camera and Microphone to enable Audio-video chat. Text chat can be performed between teacher and students in Messages tab as shown in screens below from teacher and student perspective respectively.
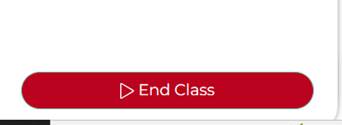
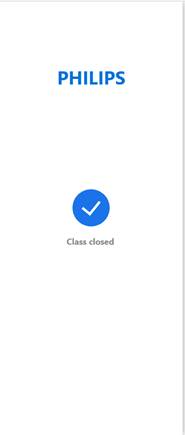
Once teacher ends class by clicking on End Class button then all students will also exit class and will see screen as indicated on right.
Collaboration
While starting Virtual Class teacher can configure Collaboration mode as Presentation or Collaboration. In Presentation mode, whiteboard operations made by teacher is visible to all students and students cannot make any whiteboard operations. In Collaboration mode, whiteboard operations like draw, text typing, insert images/shapes are allowed by students as well which are then visible to all members of virtual class. |